Friday, August 30, 2013

Diaper Motorcycles

I am so excited to share my latest product with all of you!  Last time I wrote about a product I showed you all these adorable little diaper babies!  And today's item is right in line with those.  

Diaper Motorcycles!  Here's what they look like!


Babies go through a ton of diapers every day!  You definitely can never have too many on hand.  So what better way to help out mom and dad by adding to their diaper supply.  And what better way to impress them with this gift than by giving them a diaper motorcycle!

Each motorcycle comes equipped with:
~ 20 Parent's Choice size 1 diapers
~ 2 receiving blankets
~ 1 four ounce bottle
~ 1 baby washcloth

I have some in stock and ready to ship (the four pictured above) but can also make custom orders to fit what you are looking for.  Whether you just want to just pick the colors, or the gender, or you want to be part of the process from start to finish together we can create the perfect motorcycle (or motorcycles) for you!  Want some more pictures?  Here you go!


Aren't they cute?!  As always, you can purchase one by visiting my Etsy page heremy Facebook page here, or you can e-mail me at craftedbycorley@aol.com.  Whatever method is easiest for you!  I can also answer any and all questions you may have!

Tuesday, August 27, 2013

A Revamped Freezer

A while back I shared my newly organized fridge with all of you, and I am happy to report that it is just as clean and organized as that day!  And yes, it still makes me happy to open the refrigerator door :)  However, opening the freezer door was a much different story.  Only dread awaited me when I needed to get to the freezer.  Why?  Because it looked liked this:


Shield your eyes, hide your kids, this freezer is going to burst at any moment!!  Getting food out of this freezer was similar to playing a game of Jenga.  Though in this version, one wrong move sent frozen food scattering along the floor, not wooden blocks...  What a nightmare.  So it was definitely time for a change!  Off to....you guess it!  The Dollar Tree!

My roommate and I bought:
- 2 plastic wire racks ... $2
- Rubber mat ............... $1
- 2 stackable cubbies ... $2
TOTAL ...................... $5
And that's all!!  We already had the contact paper on hand (left over from our fridge organizing project) so with just $5 worth of items we were ready to go!

The wire racks were not deep enough to just buy one, so I bought two to treat as one shelf.


First I cut a piece of the rubber mat (unfortunately we did not have leftovers of this from the fridge) to fit the size of the two wire racks.


Then I cut a piece of contact paper to fit on top of that.  Just peel off the back, stick it the rubber mat, and you're ready to go!


I cleared out the entire freezer (including wiping it down to get it nice and clean).  It gave me a chance to group everything in to categories and throw anything out that had expired.  Then I stuck the covered shelf in and put the cubbies on top.  I forgot to take a picture of this step but I think you get the idea.

Originally we had all of our frozen fruits in the bags but I decided to revamp that idea.  We use the frozen fruits for smoothies or for a frozen snack.  So I separated them into three different sized tupperware containers.  The largest for a smoothie servings, medium for combining different fruits for smoothies, and the small for snack size.  Now we can just grab exactly what we want.  And, though it took a little bit of time to separate them, will make it easier in the long run.

And here's the final product!  Beneath the shelving unit we have our frozen vegetables, the bottom stackable container holds our meats, the top stackable container holds our frozen fruits, the side of the shelving unit holds any large boxes (right now that means Bagel Bites).  There are a few other things in there as well that were placed next to the stackable containers on the shelf.


And now the door holds much less so things aren't toppling over on us.


The freezer doesn't make me as excited as the fridge does but it is worlds better than it was before.  It may not be the prettiest, but it is functional and organized.  And that's what we set out to do!

What about your freezer?  Share share share!  The good, the bad, and the ugly!

Monday, August 26, 2013

Zombie Survival Kit

So I don't know how many of you have seen the zombie survival kits on Pinterest but I've seen them a few times and knew I had to make one myself.  And what better occasion to make one than for a birthday!!  Yup!  I made a zombie survival kit birthday present :)

The first thing I needed to do was grab a bunch of candy (plus a few other supplies).
Supplies List:
* Red Hots cinnamon mints
* Marvel Avengers Taffy
* Certs classic mints
* A bar of caramel filled chocolate (I don't remember the brand)
* Skittles riddles
* Whistle Candy
* Cry Baby Sour Mini Drinks
* Gumballs
* Wooden box for the gumballs
* Toy gun
* Plastic container

Here are some pictures of all of my supplies:


And now came the fun part!  Creating different labels to transform this pile of ordinary candy in to the perfect zombie survival kit!  First up came the Red Hots.  I created labels to fit over the top and made them a set of first aid pills.  Definitely a necessary item during the zombie apocalypse.  Notice the bite marks in the corners?  How perfect!


Next came the taffy.  They were similar in shape to a protein bar (though definitely not as thick) so they quickly became Emergency Energy Bars!  I love the logo I was able to find for them.


The Certs mints?  What better way to label those than as Water Purification Tablets!  Under the stress of a zombie attack you can't be picky about where you get your water, but you need to make sure it's safe to drink.  So your kit should definitely include these!  Loving the logo for these too :)


And what about a walkie talkie for communication?  No worries!  Our caramel filled chocolate bar was the perfect candidate!  I just printed out a picture of a walkie talkie :)


Of course there will be many cuts, scrapes, burns, etc during any zombie apocalypse so having a first aid kit on hand is definitely to your advantage.  So why not transform the box of skittles!


In a pinch and need to send out a distress signal?  Have no fear!  Whistle Candies are here!


And even though you may have your supply of water purification tablets on hand, sometimes there is just no water to be found.  So you cannot be caught without your emergency water supply!  Transform those Cry Baby Sour Mini Drinks into a portable supply of water.


And of course no zombie apocalypse is complete without a lot of shooting.  Which means a lot of bullets.  I emptied the gumballs into this little wooden box and labeled it for bullets (I got so lucky with the logos I was able to find!)


Assemble it all together in the plastic container and you're all set!


Oops!  Can't forget the gun!


I created all of the labels for this kit in Numbers (the Mac version of Excel).  Just measure the dimensions of your candy and make a rectangle to fit.  I designed my labels to fit just the top of the candies rather than making sleeves to stick them in, but you can create your labels either way.  If you ever create your own I'd love to see pictures!

Thursday, August 22, 2013

Academic Planner Reveal!

How many of you are as picky about your planner as I am?  And, the ones I like most, are the most expensive.  And still none of them were ever perfect.  I like to have a two-page weekly spread with a section separated by times so I can write down all of scheduled events for the day.  But I also like to have a place to write down to-do's and other notes for each day.  But I've yet to find a planner that actually fits these ideals.  So I made one!  And now you can have it too :)

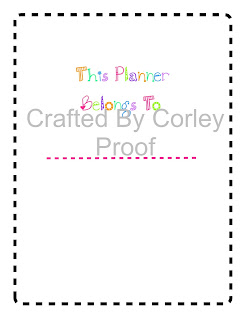
The planner starts off with a simple, colorful intro page.  Just a way to personalize your planner and make you smile when you open it :)


Then each month has a two page, portrait view spread!  

And each week also gets its own two-page spread!  The top section is perfect for jotting down thoughts, to-do's, doodles, and all sorts of other things while the bottom section is perfect for keeping track of your day to day schedule.  And there's more open space on the side to put things for the week that don't necessarily belong to a specific day!


I really love the way the printables turned out!  They are available on my Etsy page so you can have your own personal planner too!  You can print them from your home computer or have them printed professionally.  While I would love to print them all on my printer, the color quality is not very good.  So I will take the PDFs somewhere to be printed this weekend.

This is an academic planner so it runs from August 2013 to July 2014.  A calendar year planner will be available for 2014 down the road.

The PDFs will fit in a 3-ring-binder, you can have them spiral bound, and they work with Staple's discbound system.  Once I have mine printed and assembled I will share the finished product with you all :)

Wednesday, August 21, 2013

I have so many projects on my To-Do list!  I don't even know where to start!  Currently I am working on designing my own planner :D  Really excited about that!  I'm so picky about which planners I buy and which ones I don't.  So I've decided to stop hunting for the perfect one and just make it myself :)  I'll definitely keep you all updated on my progress.

I am also working on making a household binder.  I've seen a bunch of great ones on Pinterest and have decided it's time to make my own!  So that's also on my To-Do list of things I'm creating.

So I don't really have anything to show you all today, which is a bummer.  But I'll get to work and have a much better blog post tomorrow :D  At least I hope so!

Have any of you been up to exciting things?  Feel free to leave a comment and share :D

Monday, August 19, 2013

Computer's are Rooms Too!

Okay...so maybe they aren't really rooms exactly but they are important!!  Take a look at your desktop. Is it a cluttered mess like mine was?  I try really hard to keep everything in folders and keep it all organized but it gets so difficult.  Especially now that I'm getting into blogging and working on building my Etsy account!  So I decided it was time to organize my desktop!  And here it is:


I love it!  Now everything has a place on my desktop and it looks so pretty.  I think the background colors will be my inspiration for when I start to decorate my crafting/office space.  Though I'm not positive on that.  I have the banner areas set up so when my icons "snap" into place, they fit perfectly!  And the little thought bubble in the top right corner holds whatever disk is currently in my cd drive.  So much prettier and so much more organized!

Anyone else have a system for organizing their desktop?

Thursday, August 15, 2013

Toilet Roll Binoculars!

Summer is coming to an end!  And for some families summer has already come and gone.  But that doesn't mean that fun kids crafts need to head out the window also!  Whether you are in your last days of summer or first weeks back to school, here's another great, inexpensive kids craft your kids will love :)  I know that A. and O. did!  We transformed a few saved up toilet paper rolls into the perfect explorer binoculars :)

The day before heading to their house to nanny I got all of the materials together.  I saved up four toilet paper rolls (2 for each set of binoculars).  I decided to pre cut strips of paper to wrap around each roll because I don't trust the little trouble maker O. with scissors!  Haha.  But the kids could definitely cut this part out themselves which would make prep time even shorter!  Then I just grabbed some twine, glue, and a pack of crayons and was ready to roll!  Haha, get it, like toilet paper roll....  Just me?  Yea okay...

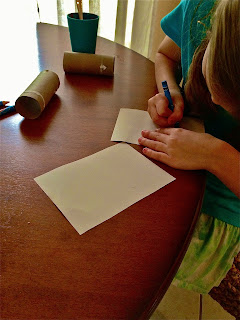
So they got to work coloring (which went a lot faster for O. than for A. as you can tell!)


O. ended up having me write numbers on his since he didn't want to.


So many crayons and supplies everywhere!!  I used some scissors to poke holes in the sides of binoculars once we glued the decorated paper in place.  Then used more glue to attach the rolls together.


Then I threaded the twin through the holes and knotted them so they would stay in place.  The kids loved them!  And they turned out pretty cute :)  And once the craft was finished they went outside and explored everything with their new binoculars!


Wednesday, August 14, 2013

Laundry Room Makeover

So, if you haven't noticed, I have given up on the set weekly schedule for topic ideas.  It's too restricting and I lose motivation.  From now on I will blog what I feel!  And today that means the laundry room!!! Yayyy

I know.  Who would have thought I'd ever be excited over a laundry room.  I certainly didn't!  Who loves to do laundry?  No one!  Well, I was looking at my laundry room and feeling extremely unmotivated to do my laundry.  So I thought that maybe if I organized and decorated it I would be more motivated to spend time in there.  Challenge accepted!  And completed :D  Get ready for a picture heavy post!

So here's what I had to start with:


It wasn't awful but it was BORING!!  Not exactly the spot to get anyone motivated to do laundry.  So it was time to take a trip to, you guessed it, Dollar Tree.  The key to decorating with the Dollar Tree is hunting for what you are looking for and making sure it doesn't look cheap.  Because you could easily end up buying things that will look like they are from a dollar store.  Not exactly the look you're going for.  Luckily I was able to score the perfect items!!

I bought some bins and baskets that came in sets of 2 and a large bin.  But, of course, you can't find everything at the Dollar Tree so it was time to hit up Walmart.  I found the perfect candy jars for storing detergent and Borax!  Score :)  And I found them in two different sizes which is exactly what I was looking for.  I knew we needed large ones to hold detergent and Borax but needed a smaller one to hold the washing pods (we were given a bunch for free but don't plan on buying them any more, just too expensive).

Once the room was cleared out and everything was organized into their new containers, here's what we had!


Definitely an improvement!  But still not finished.  The shelves still seemed to be lacking something.  And the walls were still way to bare.  So back out shopping it was!  I picked up some foam disks (a large one from Walmart and a small one that I had on hand).  The plan: cover them in fabric and use them to store the extra buttons that come on clothes!  I always end up losing those things...  I also picked up a silver picture frame from the dollar store.  My favorite blogger over at iHeart Organizing gave me the inspiration to add a stain removal sheet found on Martha Stewart's site.  But the frame wasn't perfect so I decided to help it out! 


I decided to take some yellow paint a q-tip to transform those silver little bubbles to something that would match the room!


Much better!  It matches the decor very nicely now.  And the silver adds something to the room too.  So what about those fabric covered disks?  Well here they are in all of their glory!


Pretty cool, huh!  So now the walls were taken care of.  But what about the shelves?  Well, a mason jar that I had on hand, a new glass dish, and some labels took care of that problem!  I made some labels on my computer and printed them out.  Since I'm not cool and I don't have a Cricuit for Silhouette (though I'd LOVE to have one!) I cut them out by hand.  And what better way to attach labels in the laundry room than using clothes pins!


Cute right?!  So here's the new laundry room in all of its glory!


Do you love it as much as I do?  Since I'm in a rented apartment my room upgrade options are extremely limited.  We are allowed to paint one wall in each room as long as we paint it back white when we move out.  So trying to keep the repainting to a minimum we are only going to paint the accent wall in the living room.  So painting wasn't in the cards.  And we couldn't update the wire shelving units or add cabinets or anything.  So I had to work with the decorations instead of any permanent changes.  And I'm still very pleased with the outcome!  And now for lots of fun pictures:


So what do you think??  I'd love to hear your thoughts :)