Tuesday, December 17, 2013

Hot Cocoa Cart

It's winter time!!  Even though you'd barely realize that in Florida.  But hey!  It was in the 40's this morning which, in my book, is cold!!  And what better way to celebrate the holiday season than with a cup of hot cocoa??

Our apartment is kind of an awkward shape.  Here's the ground plan so you can sort of see what I'm talking about:


When you walk into the apartment (where the arrow is) and walk to where it has a designated "dining" space, there is just no room for a table and chairs.  So we've got two bar stools set up at the kitchen counter and we either eat there or in the living room.  So that leaves the bare area that is labeled "dining".  Of course, some of that space is actually part of our living room, but not all of it.  And so there's just nothing there.  Well, what a perfect candidate for our hot cocoa cart!

I bought a three shelf unit from Walmart a little while back thinking I could use it for my display area in Funky Trunk Treasures since I am selling things there.  But it didn't end up working out the way I thought it would so I nixed the idea and brought it back home where it didn't have a purpose.  And, like all surfaces without a purpose, became home to clutter and stuff.  Time to reclaim it and give it a purpose!  So I cleared it off and draped a beautiful shower curtain over it :D  Yea, seems strange to use a shower curtain.  Let's clarify:

I bought this shower curtain a few months ago at Beall's Outlet because I loved the pattern and had actually been eyeing something very similar at JoAnn's.  Originally I bought it thinking I was going to make a bench for the patio and new a shower curtain would hold up to the rain and moisture.  And since this shower curtain is fabric based, it would be perfect.  But, since that bench never happened and I don't see it happening in the near future, it works wonderfully for this new job!


Pretty!

Next up: load up the cart!


Well if you're going to make hot cocoa you need a nice glass mug and hot cocoa packets!  There is no place to get hot water on this cart but the kitchen is just a few steps away to where there is a tea kettle waiting to boil up some water.  Now what else do we need?


Mix ins!  Want to know the best part?  Everything in this picture was picked up at the Dollar Tree!  All the mix ins and the containers that hold them!  I will probably end up spray painting the tray since it doesn't match the fabric and looks out of place.  But for now it will stay like this.


Go ahead!  Grab a mug, a hot cocoa packet, and start adding your mix ins to make it delicious!  We've got marshmallows, ground cinnamon, and mini candy canes.  And when you're done, grab a cinnamon stick or peppermint stick and give it a good stir.


Monday, December 16, 2013

Front Door Makeover!

It's been a while since I've done a project to make the apartment beautiful and more homey.  I haven't had any motivation to continue in the living room.  And it felt wrong to start somewhere else until I was finished there.  Well a few days ago I had a realization: that's dumb.  Who cares if the living room isn't 100% finished??  Strike while the motivation is hot!!  Wherever that may take you.  And this time it took me to the front door :)

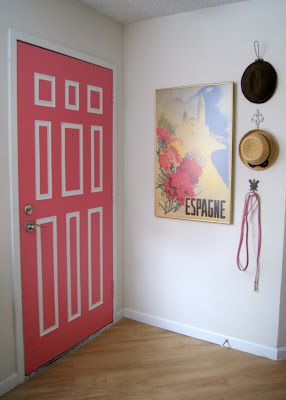
I don't follow many blogs.  In fact, I only read one.  The amazing iHeartOrganizing blog!!  You really need to go check it out if you haven't already.  She is fantastic!  But I recently added another blog to my reading list.  Meredith and Gwyneth, The New Yorkie.  This girls apartment is absolutely adorable and I want it!  She has projects and home tours from her apartments in New York and California.  And it is just her and her adorable yorkie dog :)  Part of the home tour for both of these apartments includes her painted front door!  Take a look!!


Isnt' it amazing?!  I knew I had to have it!  And while I am in love with the pink color, my roommate isn't too crazy about it.  She doesn't hate pink, but she doesn't love it either.  So I went with something we both love and had on hand.  Blue!  Left over from our stenciled living room wall (which I've never fully revealed on here so that will be coming up soon!)

So here is what we had to start with:


Boring.  White, white, white...  just like everything else.  So it was time to get to work!  First up: tape off all the areas that weren't getting the blue paint.


Note: don't be stingy with the tape.  Over tape if necessary!  This way you can avoid having to go through with white and touch up areas you accidentally get paint on...  Lesson learned.

Then it was time for a coat of paint! Pretty blochy.  But that's a-okay!  It'll just take a few more coats of paint.


Note: It's best to use a roller for this type of project.  It will go much quicker and you won't have to worry about brush marks.  I used a sponge brush...not the best type of tool for the project.  But it did work

After that had some time to dry, it was time for another coat of paint!  It's not as easy to tell in this picture, but it was still pretty blochy and needed another coat of paint.  So time to wait for that to dry.


Remember, just because you are DIYing something, that does not mean you need to settle for "good enough."  Go ahead and go the extra steps to make it look more professional and something you can be really proud of!

For instance: our door has a peep hole.  But the sponge brush couldn't really reach the inside.  And I didn't want to try to hard because getting paint on the peep whole glass defeats the whole purpose.  So go ahead and get a small painting brush and reach the little spaces your bigger brush or roller couldn't reach.  It makes a world of difference!


And those spots where you didn't put painters tape because you were confident in your ability to paint around them but turns out you weren't... Yea.  Touch those up.


So a few touch ups and another coat (man that door was cold! wow..okay that pun was funnier in my head) and... TA DA!  Beautiful.  Well, almost.  Now for the moment of truth!  Time to cross my fingers and hope the door looks just as amazing as I envisioned...


And it does!!  It looks fantastic!  What an improvement from before.


Want to see a before and after?  Pretty drastic difference!  It's amazing what a simple coat of paint can accomplish.


Tuesday, December 10, 2013

Tea Envelopes

Yesterday I shared about one way to gift a beverage with my Wine Gift Tags.  But I've been busy crafting up another way to share a delicious drink this holiday season.  Tea Envelopes!!

As I'm sure you all know by now, I am a tea lover!!  One of my best friends in high school gifted me a box of tea for Christmas one year and I loved it.  So do the same for any tea lover in your life.

Each envelope has a decorative cover and is tied up with a ribbon.  Then it opens to reveal a friendship poem and a packet of Twinning's brand English Breakfast Tea.  The poem reads:
A little cup of friendship,
in this cup of tea
When you sit and drink it,
I hope you think of me


I made a bunch of Christmas themed ones just for the Holiday Season!  But, of course, I plan to make others that can be gifted year round.


These Tea Envelopes would make great little stocking stuffers!  Or you can put them in a mug with a gift card to Starbucks or something as a great gift for teachers, co-workers, and anyone else on your Christmas shopping list this year.


Currently I am selling these for $3 each.  If you want to see which ones are currently available, they are all listed in my Tea Envelopes album on Facebook.  You can order on there or you can e-mail me at craftedbycorley@aol.com.

Monday, December 9, 2013

Wine Gift Tags

Hey everyone!  Remember me?  Its been a while.  I've been crafting up a storm over here, and nannying up a storm as well.  I just finished a craft show this weekend that was, unfortunately, a little bit of a dud.  Luckily I didn't have to pay to get into the show and thankfully I did sell a few items (unlike some people who sold nothing all weekend).  Over all it was a fun weekend and I got a lot of new items into my inventory for it!  

Today I want to share my Wine Gift Tags with you all.  I stumbled on a fellow crafters blog through Pinterest and found a bunch of really neat tutorials, this being one of them!  So I decided to give it a go :D  And here is how they turned out!


Pretty cute, eh?  I love them!  What a perfect way to gift a bottle of wine.

During the Holiday Season there are plenty of people to get gifts for.  And figure out what to get them isn't always easy.  There are co-workers, neighbors, bosses, etc.  All those people you want to get a gift for but have no idea what to get them.  Or you're invited to a Holiday Party and don't want to show up empty handed.  All of this can be solved with a bottle of wine!  Or champagne or sparkling cider or..you get the point.


These gift tags let you dress up any wine bottle (or other beverage bottle) to fit any occasion!  With a little greeting or picture to get you in the holiday spirit.

I also plan to work on making some other tags for different occasions (other holidays, birthdays, and even baby showers - hey, mom's had to be sober for 9 months!).


These are all pictures of the Christmas/Winter themed ones I made.  I am currently selling them at $2 each or you can buy 3 for $5.  If you want to see which ones I currently have in stock, head on over to my Wine Gift Tags album on Facebook.  And, as always, you can create a custom order if you want something different than what I have available.


Thursday, November 14, 2013

Christmas and Holiday Aprons

It is such an amazing experience to be part of the Funky Trunk Treasures team!  Being able to see my products available in a store is incredible.  And I've sold a few items :D  Amazing!

The other day I went to check out the Funky Trunk website and saw the most adorable picture!  A precious little girl modeling one of my new Christmas Aprons!


Isn't she a cutie?!  You can check it out on the website HERE!  The picture makes me so happy.  I have a lot of other Christmas and Holiday aprons as well.  And while they are not available on my Etsy or Facebook pages yet, here are some of the pictures of the aprons available at Funky Trunk Treasures.  And you can always e-mail me if you'd like one :)


Monday, October 28, 2013

First Craft Fair

This weekend was amazing!!  I went to my very first craft show as a vendor!  I had so much fun :)  And, thankfully, I had my amazing roommate/best friend Ellen there with me.  I couldn't have done it without her.

The show itself was pretty slow.  Not many people came to browse and buy and a lot of the vendors were pretty disappointed.  But not me!  I was thrilled to be there :D  And I sold a few things on both days which was wonderful.

We got there early to get everything set up and here was the original layout:


But that was before I realized how many items I actually brought!  Since this was my first craft fair I was so worried I wasn't going to have enough inventory and my tent would look bare.  That fear was for not.  I had plenty of things!  It didn't change drastically after that but I swapped the tables and even had to add a table.  So with some rearranging and inventory adding, here is what we ended up with:


The guy in charge of the event was nice enough to photograph everyone inside of their tents as well.  So here is my roommate and I on both days of the fair :)


And now I'm just going to share a bunch of pictures that I took of my tent and the different items I had for sale :)


It was really a fantastic weekend and I would definitely do it again!  In fact, I think I'm going to be doing the Christmas craft fair at this location as well :)

See something you like?  Right now not all of these items are available for sale on my Etsy shop and Facebook page.  So if you see something you like go ahead and shoot me an e-mail!  I also do custom orders :)

How was everyone else's weekend?